Pin to Board
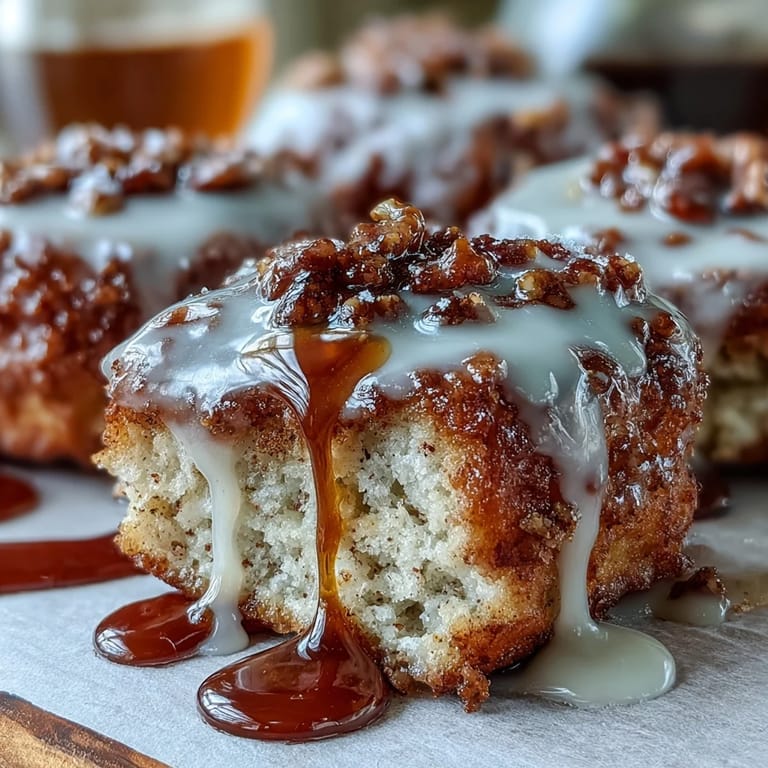
 The maple syrup hit the hot pan and my entire tiny apartment filled with that unmistakable autumn sugar smell. I was trying to recreate those grocery store maple donuts from childhood but in bar form because who has time for deep frying at 7 am on a Tuesday? These emerged from the oven with the most tender crumb I've ever achieved, and when that glaze sets just right, you get this gorgeous crackle that gives way to pure maple bliss.
My sister came over unexpectedly last weekend and I had nothing to offer but these cooling on the counter. She took one bite and literally stopped mid sentence, then asked if I'd been secretly taking baking classes. We sat at the kitchen table for an hour picking off glaze with our fingers and talking about how much better homemade treats taste than anything from a package.
Ingredients
- 2 cups all-purpose flour: The structure holding everything together, but dont pack it down or you'll lose that signature donut fluffiness
- 1 cup granulated sugar: Creates that tender crumb and helps the edges caramelize just enough
- 1 tablespoon baking powder: The lift that transforms dense cake into something light and airy
- 1/2 teaspoon salt: Wakes up all the spices and keeps the sweetness from being one note
- 1/2 teaspoon ground cinnamon: Warmth that plays so nicely with maple without overshadowing it
- 1/4 teaspoon ground nutmeg: The secret behind that nostalgic bakery flavor you can't quite put your finger on
- 1/2 cup unsalted butter, melted: Adds richness and helps create that tender, close crumb we're after
- 1 cup whole milk: I've tried lower fat versions and they just don't deliver the same luxurious texture
- 2 large eggs: Room temperature eggs incorporate better and help the batter rise evenly
- 1 teaspoon vanilla extract: Pure extract makes a difference here since it's competing with maple
- 1/2 cup maple syrup: The real stuff, not pancake syrup, because you can taste the difference
- 1 cup powdered sugar: Creates that smooth, professional looking glaze that sets perfectly
- 1 to 2 tablespoons milk: Start with one and add more only if your glaze is too thick to pour
- 2 tablespoons maple syrup: This is what makes the glaze taste like maple instead of just plain sugar
- Extra maple syrup for drizzling: Optional but honestly recommended if you really love maple
Tired of Takeout? 🥡
Get 10 meals you can make faster than delivery arrives. Seriously.
One email. No spam. Unsubscribe anytime.
Instructions
- Get your oven ready:
- Preheat to 350°F and grease a 9×13 inch pan, though parchment paper makes removal so much easier and cleanup nearly nonexistent
- Whisk the dry team:
- In a large bowl, combine flour, sugar, baking powder, salt, cinnamon and nutmeg until everything is evenly distributed
- Blend the wet ingredients:
- In a separate bowl, whisk melted butter, milk, eggs, vanilla and maple syrup until the mixture is completely smooth
- Gentle combine:
- Pour wet into dry and fold with a spatula until just combined, stopping as soon as you no longer see dry streaks
- Spread and bake:
- Spread batter evenly in your prepared pan and bake for 25 to 30 minutes until a toothpick comes out clean
- Cool completely:
- Let them rest in the pan for 10 minutes, then move to a wire rack because warm bars will melt your glaze right off
- Make the maple magic:
- Whisk powdered sugar with 1 tablespoon milk, adding more only if needed, then stir in the maple syrup
- Glaze like you mean it:
- Once bars are completely cool, drizzle that glaze back and forth until every square inch gets some love
- Final touch:
- Let everything set for 10 to 15 minutes before slicing, otherwise you'll have a gorgeous but messy situation
 Pin to Board
 My neighbor texted me at 9 pm asking what smelled like a maple syrup factory had moved in next door. I brought over a plate and she texted back five minutes later saying her husband was already asking when I'd make them again. Now they're my go to for new neighbors and comfort cravings alike.
Make Ahead Magic
The unfrosted bars keep beautifully for two days wrapped tightly on the counter, which means you can bake them the night before and glaze fresh the morning of your brunch or gathering. I've even frozen the cooled, unglazed bars for up to a month and they thaw like they were baked yesterday.
Serving Suggestions
These shine alongside a strong cup of coffee and maybe some fresh berries to cut through all that sweet maple goodness. I've also served them warm with vanilla ice cream for dessert, which feels decadent but takes zero extra effort.
Storage and Keeping
Once glazed, these bars are best within three days stored at room temperature in an airtight container. The glaze does soften slightly over time, but honestly, I've never had them last long enough for that to become a problem.
- Separate layers with parchment paper if you need to stack them
- A piece of bread in the container keeps them from drying out
- These freeze surprisingly well if you glaze after thawing
 Pin to Board
 There's something so satisfying about turning maple donut flavors into a recipe that feeds a crowd without standing over a hot stove. These bars have become my most requested recipe, and I hope they bring that same maple joy to your kitchen too.
Common Questions
- → Can I make these maple bars ahead of time?
Yes, you can bake the bars up to 24 hours in advance. Store them unfrosted in an airtight container, then add the maple glaze shortly before serving for the freshest taste and texture.
- → What's the best way to store maple donut bars?
Keep glazed bars in an airtight container at room temperature for up to 3 days. Place parchment paper between layers to prevent sticking. For longer storage, freeze unfrosted bars for up to 2 months.
- → Can I substitute the all-purpose flour?
You can use a 1:1 gluten-free flour blend, though texture may vary slightly. Cake flour will yield an even more tender crumb, while whole wheat adds nuttiness but makes them denser.
- → How do I know when the bars are done baking?
Insert a toothpick into the center—it should come out clean or with just a few moist crumbs. The edges should be lightly golden, and the top should spring back when gently pressed.
- → Can I use real maple syrup extract for stronger flavor?
Absolutely. Add 1/4 to 1/2 teaspoon maple extract to the glaze along with the maple syrup for an intensified maple taste. This works well if you prefer a more pronounced maple flavor.
- → What can I serve with these maple glazed bars?
Enjoy them warm with coffee, tea, or cold milk. For dessert, top with whipped cream or vanilla ice cream. They pair beautifully with fresh berries or crisp apple slices on the side.