 Pin to Board
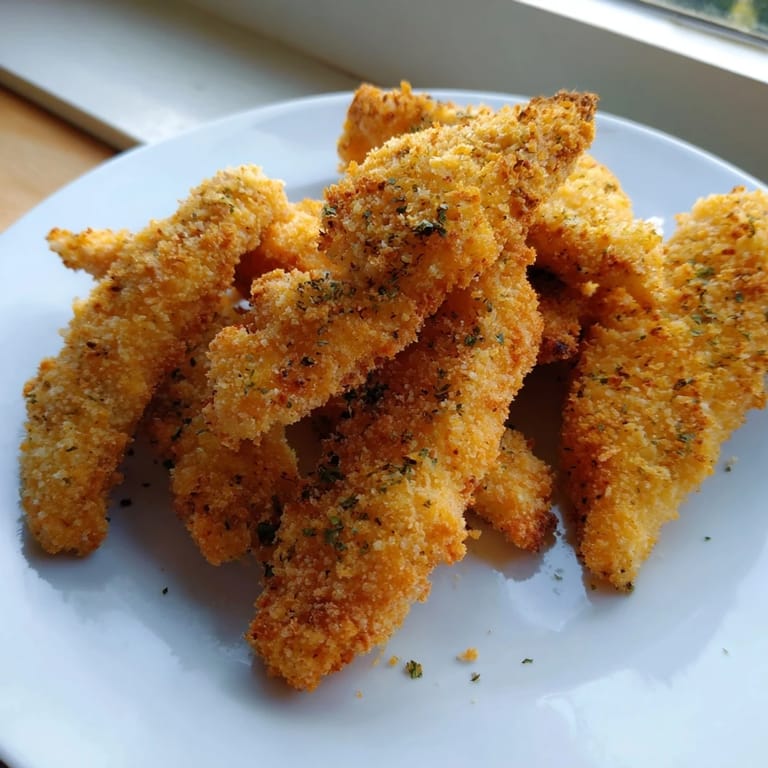
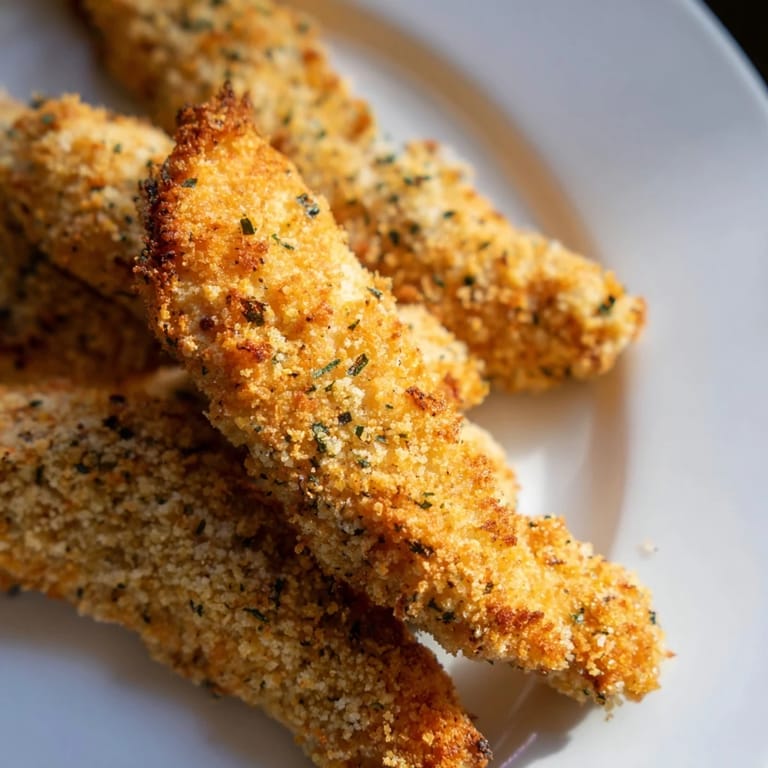
 My sister showed up one Tuesday with a bag of chicken breasts and a plea for something the kids would actually eat without negotiation. We rummaged through my pantry, found panko that had been waiting for its moment, and within half an hour, golden strips were cooling on the counter while three children hovered like hungry hawks. That impromptu dinner became our most-requested weeknight solution, proving that sometimes the best recipes are born from necessity and a little creative scrounging.
The first time I made these for a backyard gathering, I tripled the batch and still ran out before the sun went down. Adults kept circling back for just one more, and I watched a usually picky eater demolish four strips with nothing but a side of ranch. By the end of the night, someone had scribbled the recipe on a napkin, and I knew this one was a keeper.
Ingredients
- Boneless, skinless chicken breasts or tenders (500 g): Tenders cook faster and more evenly, but breasts work beautifully if you slice them into uniform strips so nothing overcooks.
- Salt (1/2 tsp) and black pepper (1/4 tsp): Season the chicken itself before breading, not just the coating, because seasoning from the inside out makes all the difference.
- All-purpose flour (100 g): This first dusting helps the egg mixture cling instead of sliding off, creating a foundation for the panko to grab onto.
- Large eggs (2) and mayonnaise (2 tbsp): The mayo adds richness and helps the panko adhere better than eggs alone, plus it keeps the chicken moist during baking.
- Panko breadcrumbs (120 g): Japanese-style panko has larger, airier flakes than regular breadcrumbs, which is why it bakes up so much crispier.
- Dried Italian herbs (1 1/2 tsp): A blend of oregano, thyme, and basil gives instant flavor without measuring out three separate jars.
- Garlic powder (1/2 tsp), smoked paprika (1/2 tsp), cayenne pepper (1/4 tsp, optional): These add warmth and a hint of smokiness, and the cayenne is there only if you want a gentle kick.
- Olive oil (2 tbsp): A light drizzle or spray before baking encourages that golden, crispy finish without deep-frying.
Tired of Takeout? 🥡
Get 10 meals you can make faster than delivery arrives. Seriously.
One email. No spam. Unsubscribe anytime.
Instructions
- Get the oven ready:
- Preheat to 220°C (425°F) and line a baking sheet with parchment paper or set a wire rack on top for even crispier results. The high heat is what makes the panko turn golden instead of soggy.
- Prep the chicken:
- Pat the chicken completely dry with paper towels, then slice into strips about 2 cm wide so they cook evenly. Season all over with salt and pepper.
- Set up your breading station:
- Arrange three shallow bowls: one with flour, one with eggs whisked together with mayonnaise until smooth, and one with panko mixed with all the herbs and spices. This assembly line makes coating quick and tidy.
- Coat each strip:
- Dredge a chicken strip in flour, shake off the excess, dip into the egg mixture, then press firmly into the panko so it sticks all over. Repeat with remaining strips.
- Arrange and oil:
- Place coated strips on the prepared baking sheet with a little space between each one. Drizzle or spray lightly with olive oil to help them crisp up.
- Bake and flip:
- Bake for 18 to 22 minutes, flipping halfway through, until the coating is golden and the internal temperature hits 74°C (165°F). The flip ensures both sides get that gorgeous color.
- Rest before serving:
- Let the strips cool for 2 to 3 minutes on the pan so the coating sets and stays extra crispy. Serve immediately with your favorite dipping sauces.
 Pin to Board
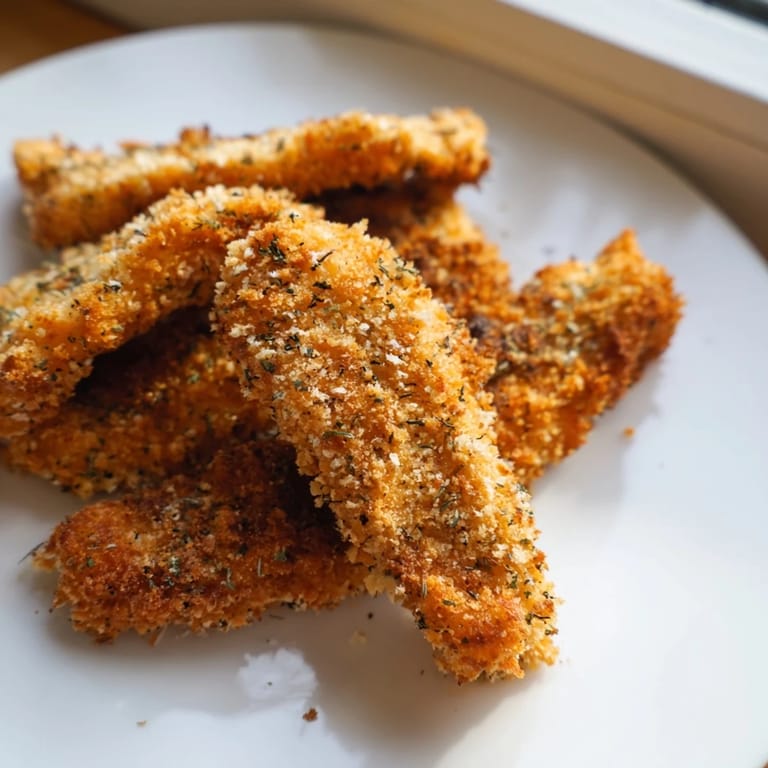
 One evening, my nephew declared these better than any fast-food version, and my brother looked genuinely shocked that something homemade could win that battle. We sat around the table dipping strips into three different sauces, debating which combination was superior, and I realized that this simple recipe had become more than dinner. It was the kind of meal that made everyone linger, laugh, and reach for seconds without thinking twice.
Serving Suggestions
These strips pair beautifully with honey mustard, ranch, or a spicy sriracha mayo for dipping, and they work just as well on a platter for guests as they do on a weeknight plate with roasted vegetables. I like to serve them alongside a crisp green salad or oven fries for a full meal, and theyve even made appearances at potlucks where they disappear faster than anything else on the table. A light Sauvignon Blanc or a cold lager cuts through the richness perfectly if youre in the mood for a drink.
Customizations and Swaps
If you need this recipe gluten-free, swap in gluten-free panko and flour without changing anything else. Greek yogurt works in place of mayonnaise for a lighter, tangier coating, and adding grated Parmesan to the panko takes the flavor up a notch if youre not worried about keeping it dairy-free. I once tossed in a teaspoon of lemon zest with the panko, and the brightness it added was a happy accident I repeated every time after.
Storage and Reheating
Leftovers keep well in an airtight container in the fridge for up to three days, though honestly they rarely last that long. To reheat without losing the crunch, spread them on a baking sheet and warm in a 200°C (400°F) oven for about 8 minutes instead of microwaving, which will turn them soggy. These also freeze beautifully after baking: let them cool completely, freeze on a tray, then transfer to a freezer bag and reheat straight from frozen when the craving strikes.
- Always reheat in the oven or an air fryer to keep the coating crispy.
- Slice leftover strips for grain bowls, wraps, or Caesar salads the next day.
- Freeze in single layers first so they dont stick together in the bag.
 Pin to Board
 This recipe has earned its spot in my regular rotation because it delivers restaurant-quality crunch without the hassle or the grease, and it makes everyone at the table happy. Whether youre feeding kids, hosting friends, or just craving something satisfying on a busy night, these strips show up every single time.
Common Questions
- → How do I achieve maximum crispiness when oven-baking?
Use a wire rack placed over your baking sheet to allow air circulation underneath the chicken, or elevate the sheet on the oven rack. Drizzle with olive oil and flip halfway through cooking. Let cool 2-3 minutes after baking for the coating to set and crisp further.
- → Can I prepare the chicken strips ahead of time?
Yes, you can coat the chicken strips up to 24 hours in advance. Cover them with plastic wrap and refrigerate. Bake directly from the fridge, adding 2-3 minutes to the cooking time. You can also freeze uncooked coated strips for up to 2 months.
- → What's the best way to keep leftover chicken strips crispy?
Store cooled strips in an airtight container in the refrigerator for up to 3 days. Reheat in a 190°C (375°F) oven for 5-7 minutes to restore crispiness, rather than using a microwave which can make them soggy.
- → How do I make this gluten-free?
Replace all-purpose flour with a gluten-free flour blend and use certified gluten-free panko breadcrumbs. The baking time and method remain the same. Always verify that your mayonnaise, herbs, and spices are certified gluten-free to avoid cross-contamination.
- → Can I use Greek yogurt instead of mayonnaise?
Absolutely. Greek yogurt creates a lighter egg wash with similar binding properties. Mix it with eggs in equal portions or use slightly more yogurt if preferred. This works especially well for dairy-free diets when using dairy-free yogurt alternatives.
- → What dipping sauces pair well with this dish?
Honey mustard, ranch, and spicy sriracha mayo are classic choices. You can also serve with barbecue sauce, buffalo sauce, or a simple garlic aioli. A squeeze of fresh lemon juice adds bright acidity that complements the herb-seasoned coating beautifully.