 Pin to Board
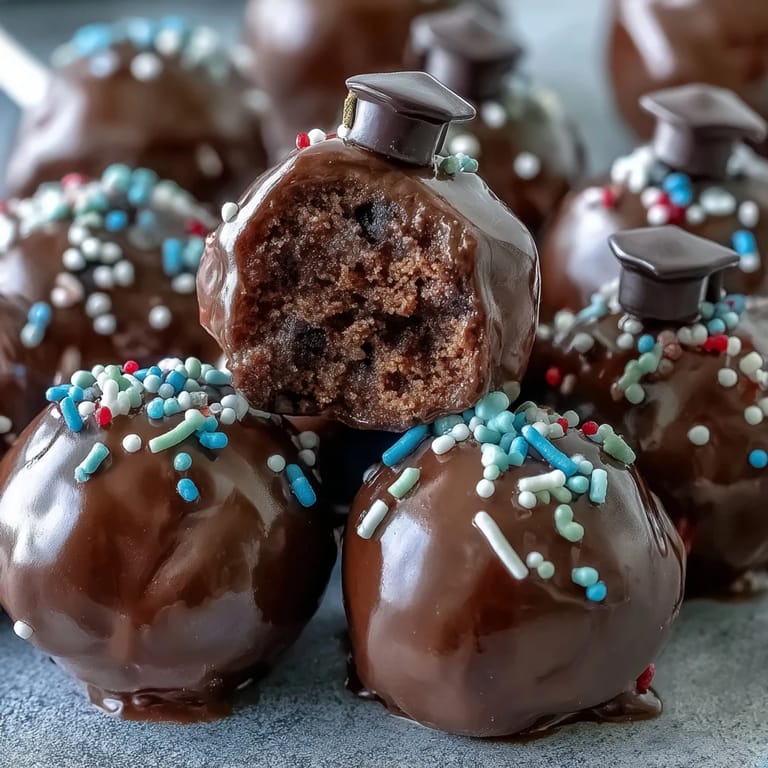
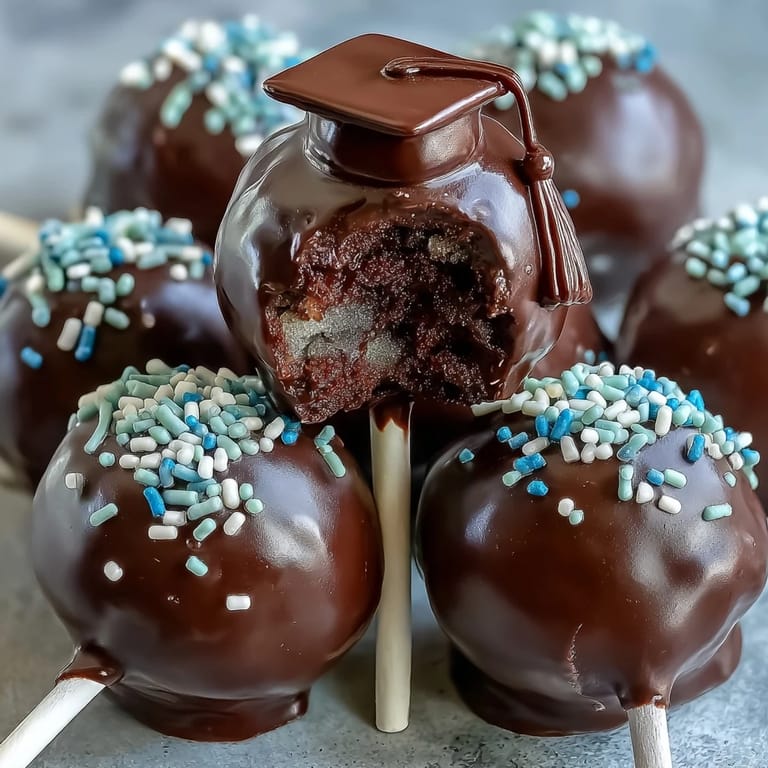
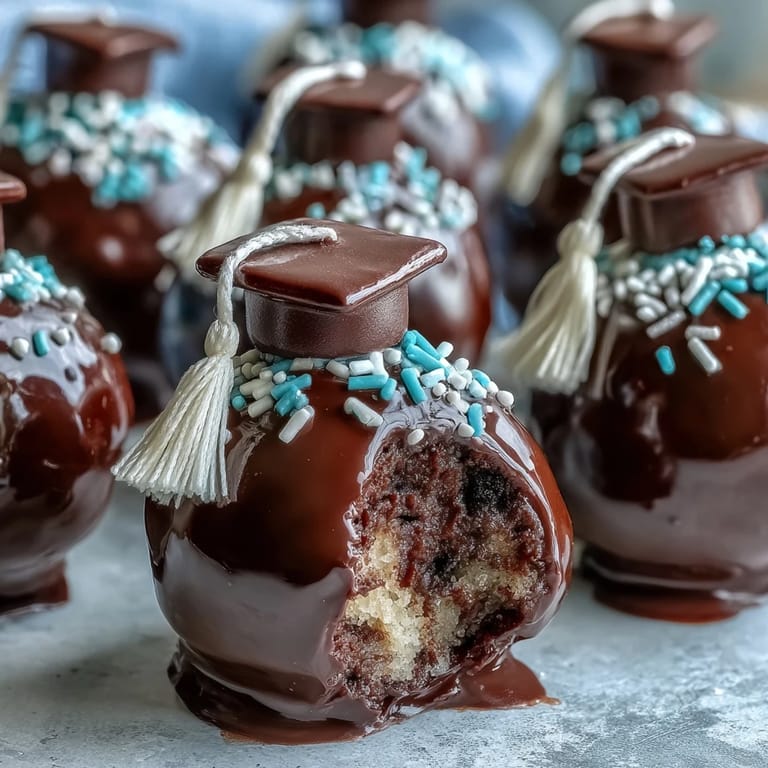
 If you've ever walked through a kitchen buzzing with post-ceremony excitement, you'll know the joy that comes from making these Graduation Cake Pops. The first time I made them, the smell of baked cake filled the air while the frosting bowl sparkled in sunlight. My hands got messy as I mixed the crumbs, but I wouldn't trade that moment for anything—especially when friends gathered around, peeking at the colorful chocolate. The pops looked so cheerful drying on their sticks, almost like little trophies. There's something about transforming cake into hand-held celebration treats that feels undeniably festive.
One afternoon before a graduation party, my cousin and I spent hours dipping cake pops and giggling as we tried to stick on mini fondant caps. We ended up decorating some with the wrong school colors—no one cared, they just loved the taste and the personalized touch. Even the kitchen table turned into a sprinkle explosion, and honestly, some of those awkwardly decorated pops became favorites.
Ingredients
- Cake: A tender, cool cake gives the base for moist pops—make sure it's totally cooled or the crumbs will clump oddly.
- Cream cheese frosting or buttercream: I've learned to start with less; a little goes a long way in binding the cake without making it mushy.
- Candy melts in school colors: These create that signature glossy shell, and thinning the melts with vegetable shortening makes coating effortless.
- Sprinkles/edible glitter/colored sugar: Sprinkles let you personalize instantly, but don't overdo it or they can weigh the coating down.
- Lollipop sticks: Sturdy sticks make assembly easier—splintering wooden ones can leave pops unstable.
- Mini chocolate chips: Perfect for tiny tassels or accents, but use them sparingly so they don't slide off wet chocolate.
- Fondant in school colors: Optional, but the squares turn each pop into a true graduation cap—cutting them is oddly satisfying!
Tired of Takeout? 🥡
Get 10 meals you can make faster than delivery arrives. Seriously.
One email. No spam. Unsubscribe anytime.
Instructions
- Bake Your Cake
- Start by baking your cake mix or homemade cake as directed, then allow it to cool fully—warm cake makes everything sticky. The scent fills the kitchen, hinting at celebration already.
- Make Cake Crumbs
- Crumble the cooled cake into fine crumbs with your fingers; it's a pleasantly tactile job and you'll smell the sweetness intensify.
- Mix in Frosting
- Add frosting slowly, working it in until the mixture holds its shape; I like to feel for that moment when it just starts to stick together.
- Shape the Pops
- Scoop tablespoon-sized portions, rolling them into balls; try to keep your hands cool or the pops get sticky.
- Chill for Firmness
- Arrange the balls on a lined sheet and chill—an hour in the fridge or twenty minutes in the freezer makes them sturdy for dipping.
- Melt the Candy Coating
- Microwave candy melts (or chocolate) in short bursts, stirring until smooth; if thick, add vegetable shortening and watch the texture loosen.
- Insert Sticks
- Dip each stick tip in chocolate, then insert halfway into each cake ball—this makes the bond strong and prevents spinning.
- Dip and Decorate
- Dip each pop fully, tapping gently to remove extra coating; while still wet, sprinkle with decorations and press on fondant caps or chips as desired.
- Set and Serve
- Stand the pops upright in foam or a stand to harden; let them cool completely before handling or displaying.
 Pin to Board
 The moment these cake pops appeared at the graduation buffet, the room filled up with proud parents and excited grads grabbing for their school colors. People snapped photos, but it was the laughter and compliments that lingered most. For a day about achievement, it felt like these bites turned memories into edible celebrations.
Decorating for Maximum Festivity
Adding edible glitter or sprinkles right after dipping ensures they adhere perfectly—wait too long and they slide right off. Sometimes we mix and match colors for a rainbow effect, especially if grads attended different schools. Decorating ends up being the most creative and social part of the process.
Making Pops in Advance
I discovered that cake pops stay beautiful for days if stored in an airtight container at room temp. If you're prepping for a big event, make them the day before and they'll still taste fresh and look festive. Refrigerating helps the coating set quickly, but take care to let them come to room temperature before serving.
Troubleshooting Sticky Pops and Smooth Coating
Sometimes the cake mixture gets too wet if you overdo the frosting—just add a few more cake crumbs to balance things out. For the coating, microwaving in short increments prevents burning and keeps chocolate workable. If pops start spinning or falling off the stick, chill them longer before dipping.
- Try adding some shortening to fix thick candy melt texture.
- Use a styrofoam block for clean drying—no messy bottoms.
- Remember, practice makes perfect and a few wonky pops never ruin the party!
 Pin to Board
 Whether it's your first attempt or your tenth, graduation cake pops always bring smiles and sparkle to tables. Wishing joyful celebrations and sweet moments for your next milestone!
Common Questions
- → How do I match cake pop colors to my school?
Use colored candy melts, white chocolate with gel coloring, or fondant decorations in your school’s colors for dipping and decorating.
- → Can I make cake pops ahead of time?
Yes, make them in advance and store in an airtight container at room temperature for up to 3 days, or refrigerate for up to a week.
- → What alternative decorations can be used?
Try edible glitter, colored sugar, mini chocolate chips for tassels, or edible markers to add graduation year or school initials.
- → Is it possible to make gluten-free cake pops?
Use a certified gluten-free cake mix and check all decorations and candy melts for gluten-free labels before using.
- → What tools are essential for making cake pops?
You'll need mixing bowls, a baking sheet, lollipop sticks, a microwave-safe bowl, a styrofoam block or stand, and a spatula.
- → How do I ensure the cake pops don't fall off the sticks?
Chill the cake balls well before dipping, and dip the stick tip in melted chocolate before inserting it into the cake ball for a secure hold.