 Pin to Board
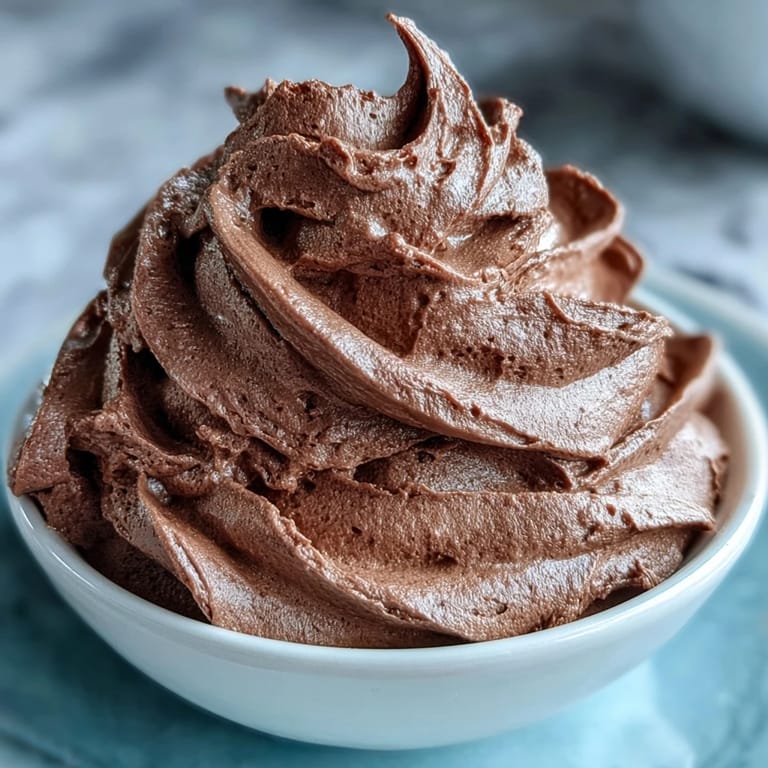
 My neighbor brought over a box of fancy chocolates one winter evening, and I became obsessed with reverse-engineering that silky texture. After a few failed attempts with overly complicated recipes, I discovered that the secret wasn't technique wizardry—it was patience and restraint. This mousse taught me that sometimes the most elegant desserts come from understanding a handful of ingredients rather than mastering a dozen steps. Now whenever someone needs a show-stopping filling, this is my go-to.
I made this for my daughter's birthday cake last spring, and watching her eyes light up when she bit into that cloud-like chocolate layer reminded me why I bake. Her friend asked for seconds of just the mousse, leaving the cake behind—that's when I knew I'd nailed it. The confidence that came from that moment stuck with me through every batch since.
Ingredients
- Semi-sweet chocolate (200g, chopped): Quality matters here more than anywhere else in this recipe—aim for 55–65% cocoa and brands you actually enjoy eating straight. Cheaper chocolate can taste waxy or lack depth, which undermines the whole mousse.
- Salt: Just a tiny pinch if your chocolate is unsalted; it rounds out the flavor and prevents the sweetness from becoming cloying.
- Heavy whipping cream (1 cup, cold): The cold bowl and cold cream are non-negotiable for getting those peaks; warm cream will deflate before you can fold it into the chocolate.
- Powdered sugar (2 tablespoons): Adjust this to your taste—some days I use less if the chocolate is already quite sweet, more if I want extra decadence.
- Pure vanilla extract (1 teaspoon): A small amount whispers in the background rather than announcing itself, which keeps the focus on the chocolate.
Tired of Takeout? 🥡
Get 10 meals you can make faster than delivery arrives. Seriously.
One email. No spam. Unsubscribe anytime.
Instructions
- Melt the chocolate gently:
- Place your chopped chocolate in a heatproof bowl and use a double boiler over simmering (not boiling) water, stirring often until it's completely smooth—you'll hear the difference when it's melted, a sort of silent smoothness as your spoon moves through. If you microwave instead, use 20-second bursts and stir between each one to prevent those burnt-tasting hot spots.
- Cool to room temperature:
- This step is crucial and often rushed—warm chocolate will scramble your whipped cream into pudding. Let it sit on the counter for 5-10 minutes, stirring occasionally until it feels cool to the touch but still pourable.
- Whip the cream until soft peaks form:
- Use a chilled bowl and cold beaters if you have them; start on medium speed and watch carefully because the line between soft peaks and overwhipped butter happens in seconds. You want cream that holds a gentle shape when you lift the beater, not stiff peaks that look grainy.
- Temper the chocolate with a spoonful of cream:
- Add just one spoonful of whipped cream to the cooled chocolate and stir vigorously until combined—this prevents the chocolate from seizing when you add the rest. Think of it as a bridge between two very different textures.
- Fold in remaining cream carefully:
- Add the cream in 2 to 3 additions, using a rubber spatula and folding from the bottom up with a gentle turning motion. You're trying to keep as much air as possible in the cream while fully incorporating the chocolate.
- Chill before using:
- For a mousse firm enough to slice or pipe between cake layers, chill for 30-60 minutes—you'll feel it transform from soft to structured. If you like it looser, use it right away.
 Pin to Board
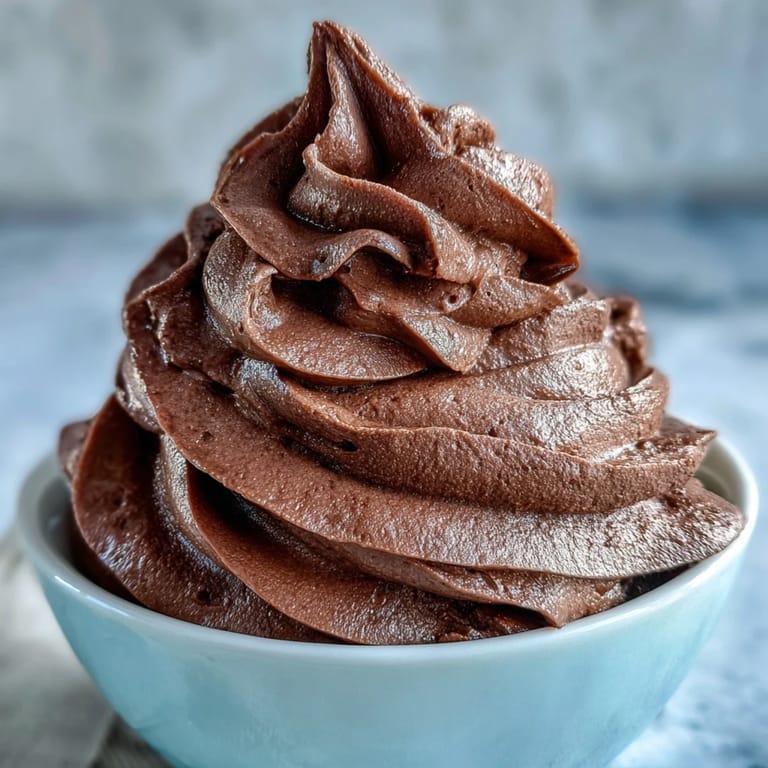
 There was a moment when I stopped thinking of this mousse as just a cake filling and started seeing it as a dessert in its own right. Spooned into small glasses with a crisp cookie on the side, it became the kind of thing that made dinner guests linger at the table a little longer.
The Secret to Silky Texture
The magic here lives in the ratio and the folding technique. Too much cream and you get airy fluff that doesn't taste like chocolate; too little and you're eating dense chocolate mousse that sits heavy. The folding motion—gently turning the spatula from bottom to top, rotating the bowl slightly with each stroke—keeps you from deflating the whipped cream while ensuring the chocolate is evenly distributed. I've watched people use vigorous stirring motions and end up with a sad, separated mixture, then switch to careful folding and suddenly it transforms into something cloud-like and luxurious.
Storage and Make-Ahead Strategy
This mousse is genuinely best the day you make it, when the texture is most delicate and the flavor is brightest. However, it keeps well refrigerated in a covered container for up to 2 days if your plans change—just understand that it will firm up slightly and may lose a bit of that ethereal quality. Never freeze it; the ice crystals will destroy the silky texture you worked to achieve, leaving you with something grainy and separated.
Flavor Variations and Customization
Once you master the basic formula, you can play around with subtle additions stirred into the melted chocolate before cooling: a splash of espresso powder (about 1 teaspoon mixed with a tiny bit of hot water) deepens the chocolate without making it taste like coffee, a pinch of cinnamon adds warmth, or a few drops of peppermint extract creates something that feels almost festive. The beauty of this mousse is its flexibility—adjust the sweetness, add liqueurs if you're making it for adults, or keep it pure and simple. A few final thoughts to keep in mind: make sure your chocolate isn't burnt or grainy before you start folding; cold tools and ingredients really do make a measurable difference; and taste as you go so the final mousse matches exactly what you're craving.
- Espresso brings out chocolate's depth without announcing itself as coffee flavor.
- A whiff of vanilla can be increased if you love that note, or omitted entirely if you prefer chocolate in its purest form.
- High-quality chocolate is worth the extra cost—it's the hero of this dish, so let it shine.
 Pin to Board
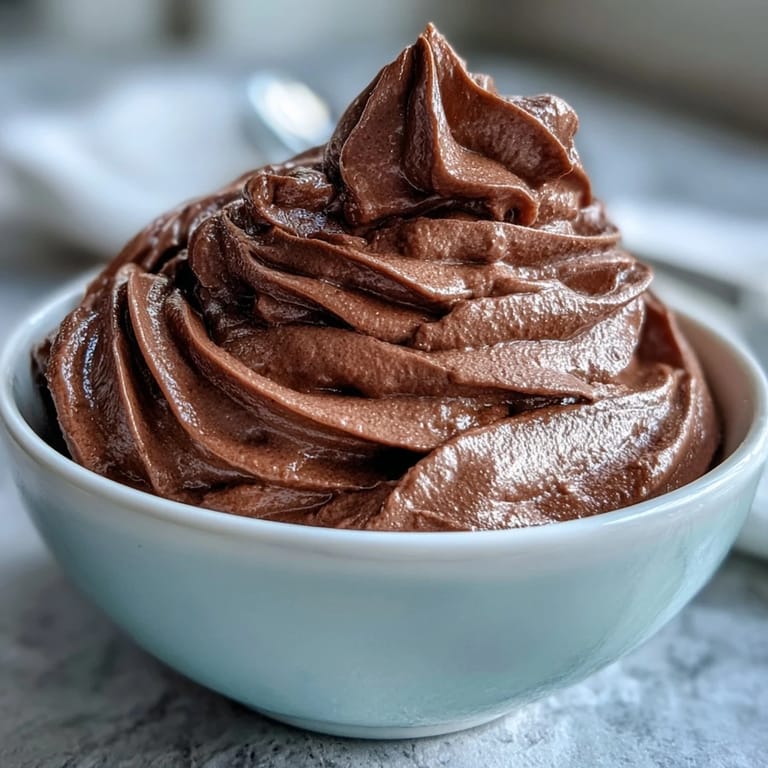
 This mousse has become my answer whenever someone says they want to impress with dessert but doesn't have much time. It's proof that simplicity, when done right, is the most elegant choice of all.
Common Questions
- → How do I melt the chocolate properly?
Melt chocolate gently using a double boiler or in short bursts in the microwave, stirring frequently to avoid burning.
- → What is the best way to whip the cream for mousse?
Whip chilled heavy cream with powdered sugar and vanilla until soft peaks form; avoid overwhipping to maintain smoothness.
- → How should I combine chocolate and cream?
Fold whipped cream into cooled melted chocolate in small additions, mixing gently to preserve volume and achieve a smooth mixture.
- → Can I prepare the mousse ahead of time?
Yes, it can be chilled for up to 2 days when covered; avoid freezing for best texture and flavor.
- → How can I enhance the flavor of the chocolate mousse?
Add a splash of espresso or a pinch of cinnamon to the melted chocolate before mixing for extra depth.
- → What are suitable uses for this mousse?
Use it as a filling between cake layers, frosting cupcakes, or spoon into cups for an elegant chilled dessert.