 Pin to Board
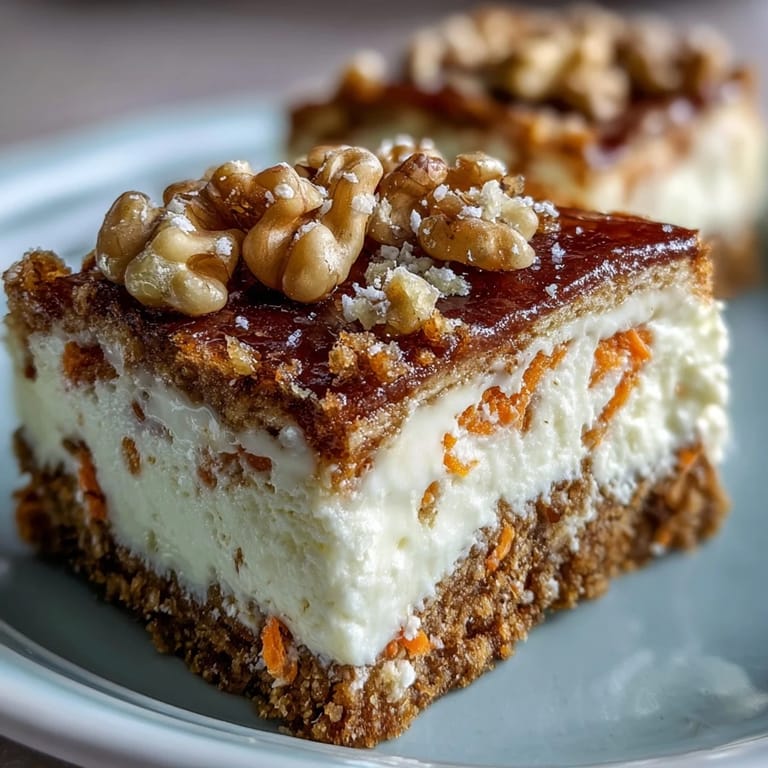
 When I first stumbled upon the idea of carrot cake cheesecake bars, it was on a breezy Saturday in early spring, with sunlight pouring through the kitchen window and the hum of distant lawnmowers outside. Combining the cozy spice of carrot cake with the silkiness of cheesecake sounded like a decadent experiment, and I couldn't resist setting out to try it. The aroma of cinnamon and nutmeg mingled with the sweet richness of cream cheese as I assembled layers, and even before tasting, I knew it would be a crowd-pleaser. Mixing batters and swirling them together brought a playful energy to my countertop. Sometimes, innovation in baking happens when curiosity outweighs hesitation, and these bars are proof.
These bars first made their debut at my cousin's baby shower, surrounded by laughter and pastel balloons, and I remember nervously slicing them into neat squares just minutes before guests arrived. One friend leaned in to ask how I managed the swirl so perfectly, while another requested the recipe before she finished her first piece. I learned that sharing something homemade is often the best conversation starter. Months later, another batch found its way to a picnic, with squirrels eyeing the dessert from the shade. That day, the bars disappeared faster than I could snap photos.
Ingredients
- All-purpose flour: It keeps both cake and cheesecake layers tender; I always lightly fluff it in the measuring cup for accuracy.
- Baking powder: Gives the carrot layer its springy lift—use it fresh for best results.
- Baking soda: Helps the cake portion stay light while balancing acidity from the carrots.
- Salt: Essential for highlighting the spices and the sweetness.
- Ground cinnamon: Warm and aromatic, it anchors the carrot cake flavor.
- Ground nutmeg: Actually boosts the subtle sweetness—always grate fresh if you can.
- Vegetable oil: Keeps the crumb moist, and neutral oil lets the spices shine.
- Granulated sugar: Sweetens both layers and gives a delicate texture.
- Brown sugar: Adds depth and a hint of caramel; pressing it firmly avoids dry pockets in the cake batter.
- Eggs: Bind everything, yielding a luscious cheesecake and sturdy cake base.
- Vanilla extract: Smooths edges of flavor and adds a bakery-like aroma.
- Finely grated carrots: Melts into the crumb for moist bars; always squeeze out excess moisture.
- Chopped walnuts or pecans (optional): For crunch and earthy richness, toasted nuts make the biggest difference.
- Cream cheese (softened): The heart of the cheesecake—let it come to room temp for easy blending.
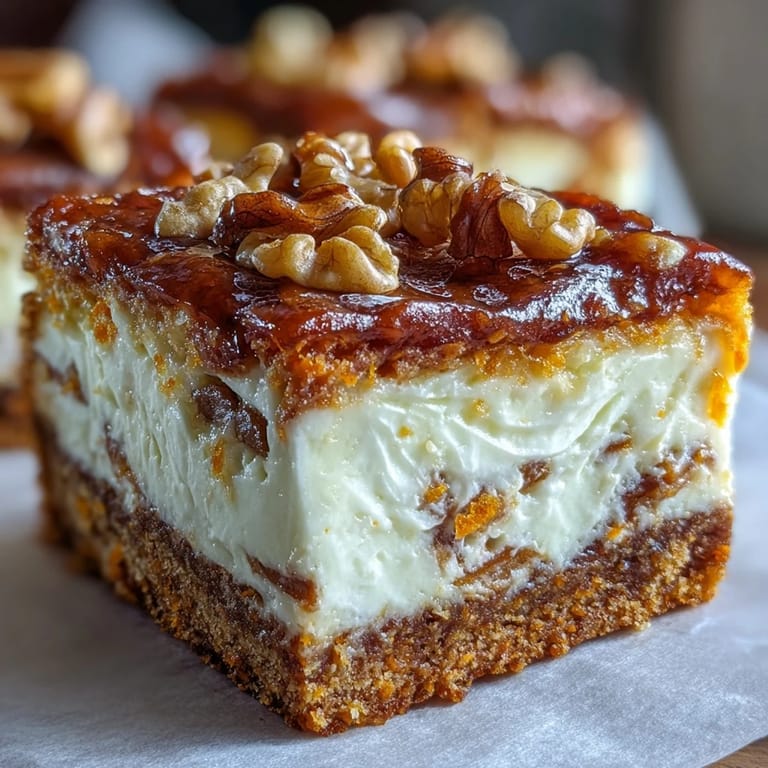
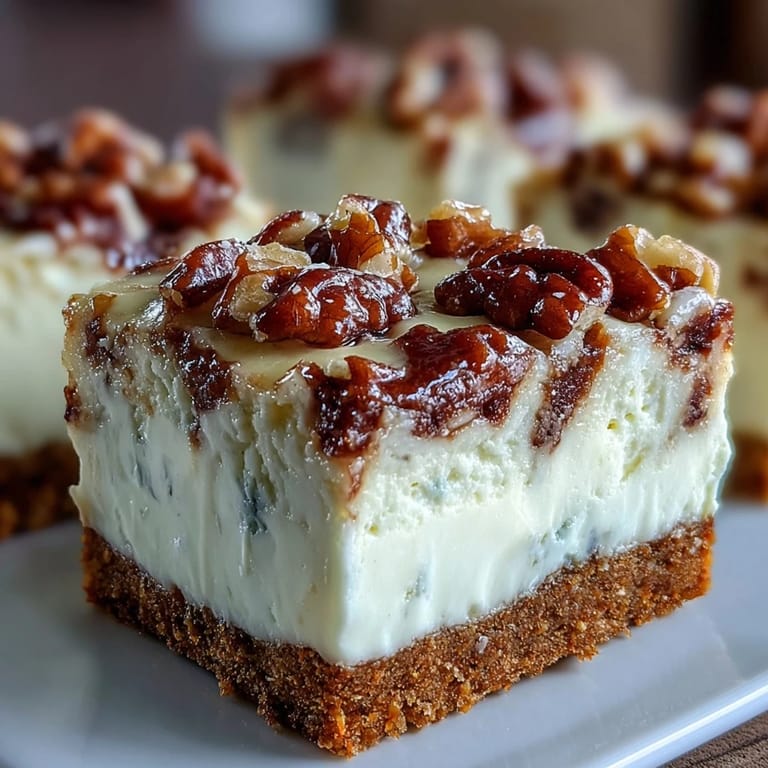
- Optional topping (nuts and cinnamon): Provides a golden finish and extra aroma, especially tasty after chilling.
Tired of Takeout? 🥡
Get 10 meals you can make faster than delivery arrives. Seriously.
One email. No spam. Unsubscribe anytime.
Instructions
- Prepare the Pan:
- Line your 9x9 baking pan with parchment, letting the edges hang over. You'll thank yourself when sliding out perfectly intact bars later.
- Mix Carrot Cake Batter:
- Whisk dry ingredients and spices to wake up their aromas, then blend oil, sugars, eggs, and vanilla until glossy. Fold in carrots and nuts, stirring just until combined for the softest crumb.
- Make Cheesecake Layer:
- Beat softened cream cheese and sugar until creamy—no lumps left behind. Add eggs one at a time, vanilla, and flour, mixing gently so the filling stays velvety.
- Layer and Swirl:
- Spread half the carrot cake batter, pour cheesecake over, then dollop with remaining carrot batter and swirl gently with a knife for dramatic marbling.
- Add Toppings:
- Scatter nuts and cinnamon across the surface if using, for crunch and fragrant warmth.
- Bake:
- Pop into the oven and bake for 45-50 minutes until the edges are golden and the center is almost set. Let cool fully, then chill at least 3 hours for neat slicing.
 Pin to Board
 One spring afternoon, while making these bars for an impromptu family get-together, my niece helped sprinkle the cinnamon on top, giggling as she “dusted” more on herself than the bars. The kitchen was filled with chatter and floury hands, and when the bars came out, their marbled tops looked like little edible works of art. That moment, dessert became a memory, not just a recipe.
Layering Secrets That Make a Difference
The trick to perfect bars is patience—layer slowly and spread gently. I once rushed, and my carrot cake batter disappeared beneath the cheesecake. Now, I use a rubber spatula and take my time so every layer stands out.
How Texture Improves in the Fridge
Most desserts are best straight from the oven, but these bars reward you for waiting. The cheesecake firms up, and the flavors deepen overnight, making each bite harmonious and decadent.
Serving Tips for a Crowd
Always slice with a sharp knife wiped clean between cuts—it keeps the bars tidy. If you want to jazz things up, serve with a dollop of whipped cream or sprinkle extra nuts just before serving.
- Chill the bars thoroughly before slicing.
- Use parchment for easy removal.
- Bring to room temp for extra creaminess.
 Pin to Board
 Each time I share these bars, I’m reminded that layered desserts bring both drama and delight. Go ahead—your kitchen will smell amazing and you’ll make something worth savoring, bite by bite.
Common Questions
- → Can I substitute nuts in these bars?
Yes, nuts are optional and can be omitted or replaced with raisins or shredded coconut for extra flavor.
- → How should the bars be stored after baking?
Store the cooled bars in an airtight container in the refrigerator for up to five days for best freshness.
- → Can I make these bars gluten-free?
Absolutely. Use a 1:1 gluten-free flour blend instead of regular flour for a gluten-free option.
- → What is the ideal serving temperature?
Serve chilled from the refrigerator for the best texture and flavor; they are great cold or at room temperature.
- → Can these bars be frozen?
Yes, slice and freeze in a single layer, then store in an airtight container for up to two months.
- → What pairs well with these bars?
Enjoy them alongside spiced tea or coffee for a comforting treat.